UW eScience JupyterHub Guide#
To access the UW eScience JupyterHub, navigate to https://uw-escience.2i2c.cloud/.
The first time you do so, you will be redirected to a login page. From that page, click “Log in to continue” and supply your GitHub credential (the one you provided to this workshop).

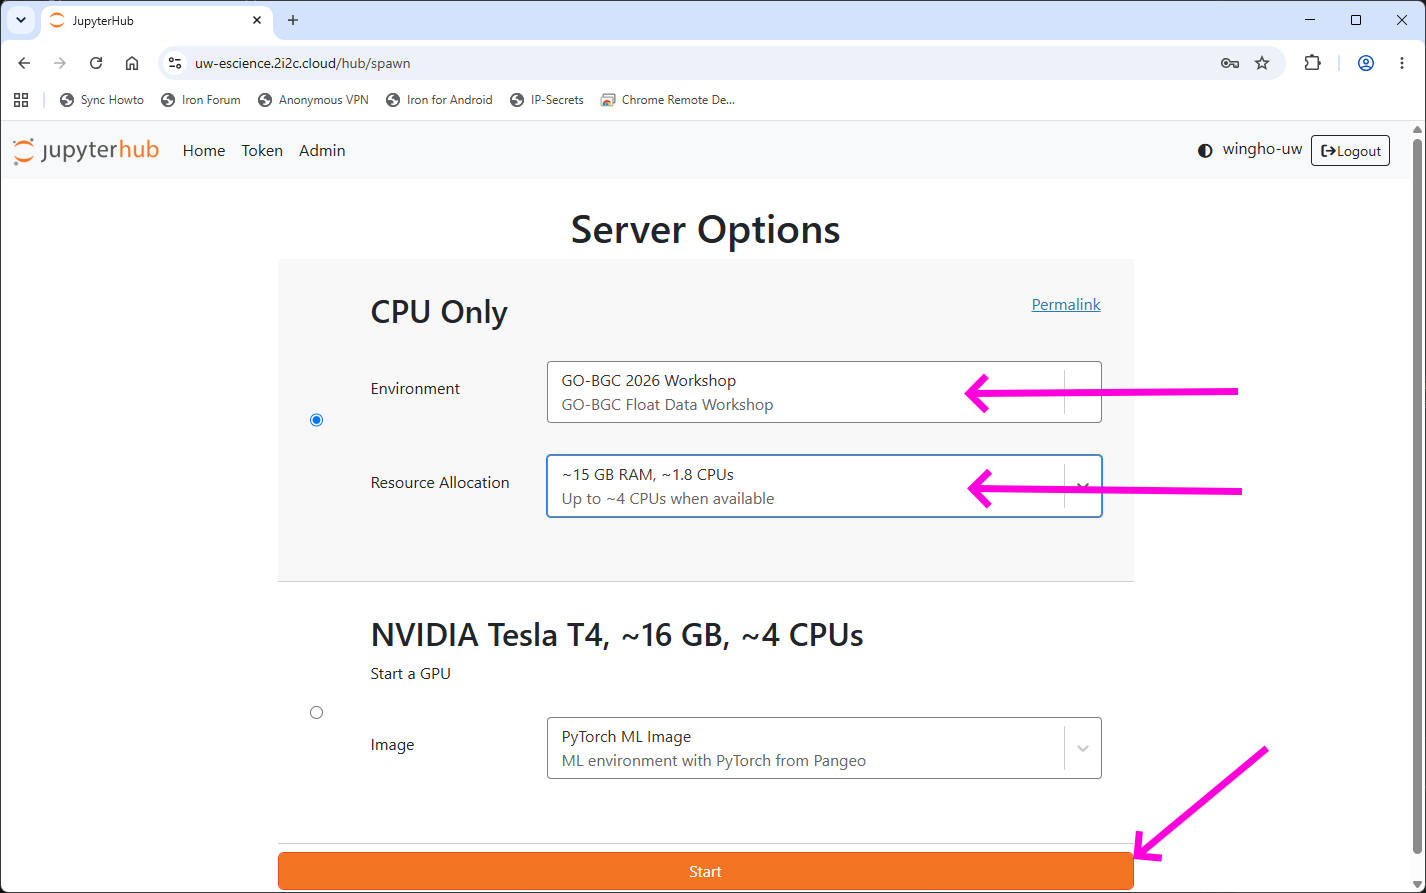
Once you login, you will be greeted with a server spawning page. A JupyterHub environment has been created for this workshop, which should be the top option under the environment tab (“GO-BGC 2026 Workshop”). In addition, you should also select a suitable resource tier for the server. The base tier (“~7 GB RAM, ~0.9 CPUs”) is usable for light data science work, but we recommend using the “~15 GB RAM, ~1.8 CPU” option as a default.
For your convenience, you can also use this permealink to quickly select this setup.
Once you select your options, click “Start” to start the server, which can take a while for the first time.
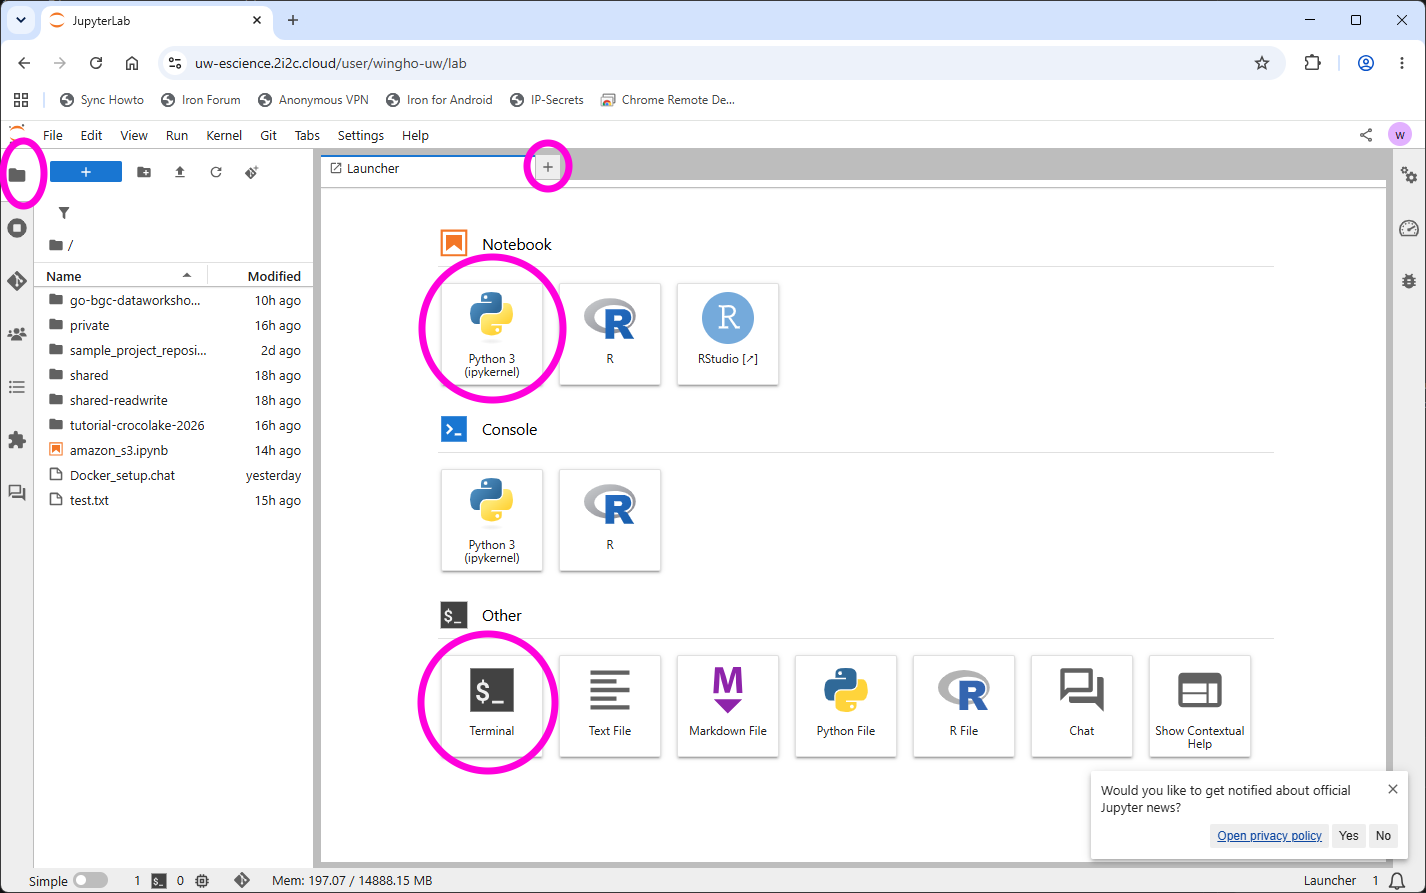
After the server is spawned, you will be brought to a JupyterLab interface. From this interface, you can open existing files using the folder panel on the left, or bring up the launcher (if not already on) using the + button in the main panel. The two options on the launcher that you will most likely use are Python 3 notebook (top left) and the Terminal (bottom left). But also note what other options (e.g., RStudio) are available.
For more on the Python 3 notebook and the Terminal interfaces, see the JupyterLab guide
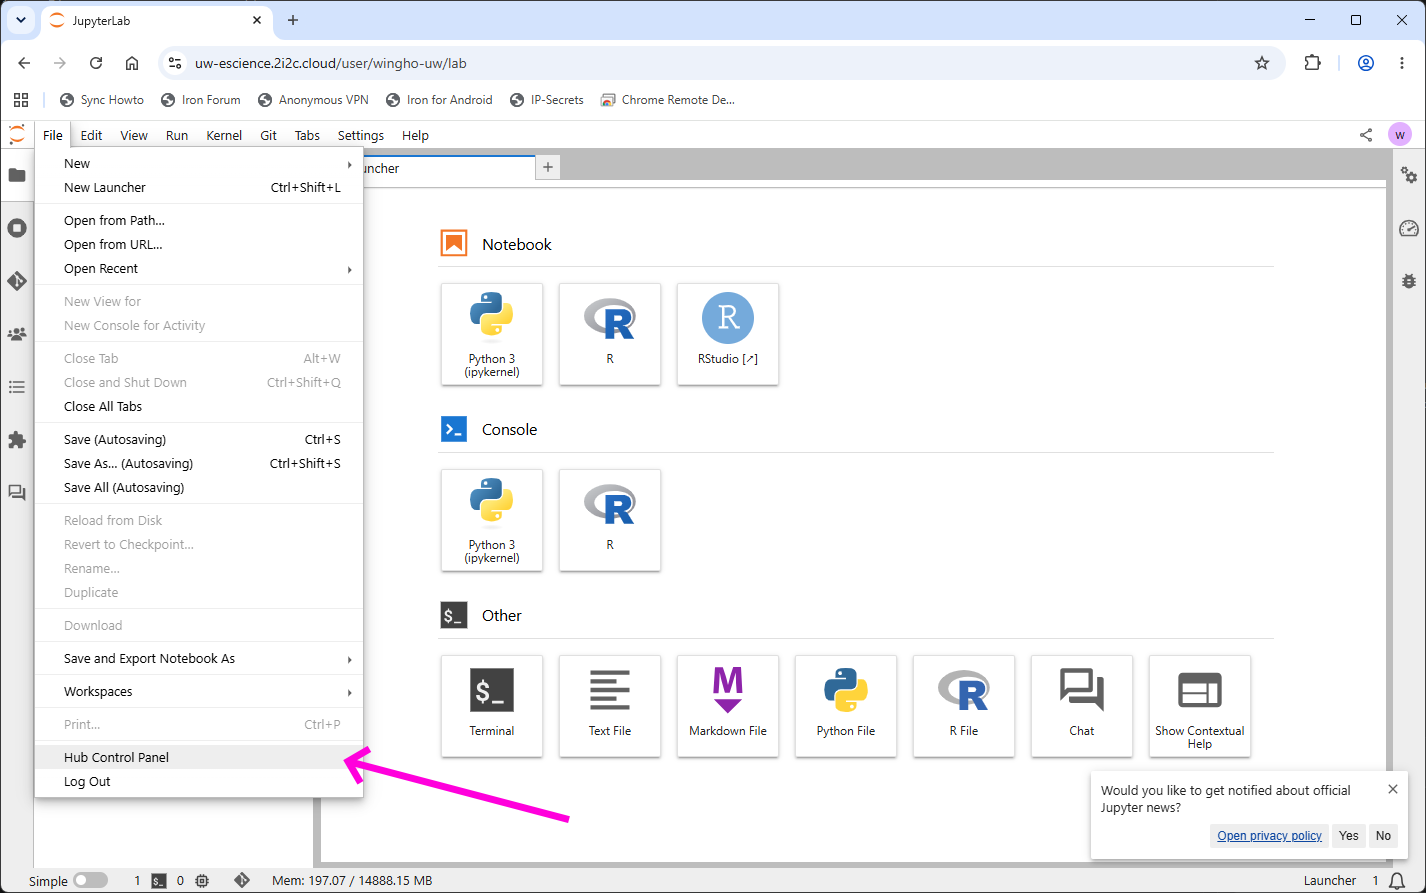
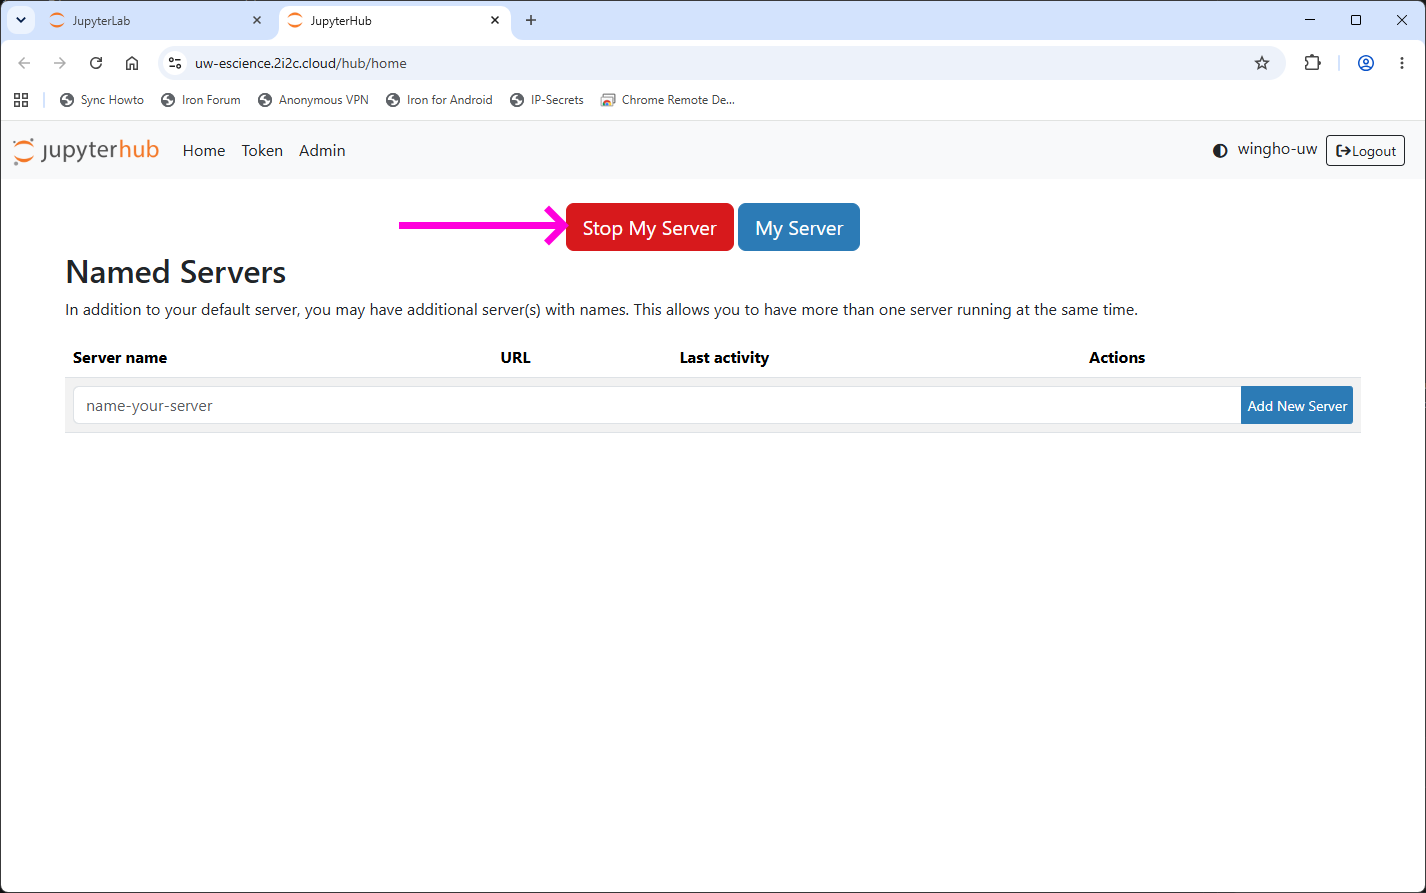
If for any reason you need to shutdown the current server and spawn a new one, use the top menu, navigate to File >> Hub Control Panel, which will bring up a Hub Control Panel page, from which you can stop the current server by clicking “Stop My Server”. Note however that all files outside of the home directory (“/home/jovyan”) will be reset, including any packages you installed.